Let’s see halmark top this!!!

Greetings fellow humans! So Spring has come (nearly) and my blogs hibernation must end as I have much to share. So let’s begin with a day that personally I don’t rate, have no time for and personally think is a idiot tax made up by corporations so that the post xmas slump in shops is not a bad as it in reality should be. I speak of course about Valentine’s Day.
Now, context. I met my girlfriend for our first few dates just before this ominous day last year, and as you might imagine we did nothing for it then, as she is very much of the same mindset as myself, make everyday a little special, not just one bitterly cold day in February. So as a result we did nothing then. Flash forward a year and we’re still together (yay) and we were off on a spa weekend break together (our xmas presents to each other) also our kinda anniversary. So I thought what better way to commemorate such a milestone than with a custom made gift and card to match. The gift was a simple thing if I’m honest, almost not worth going into detail on, but ok then.
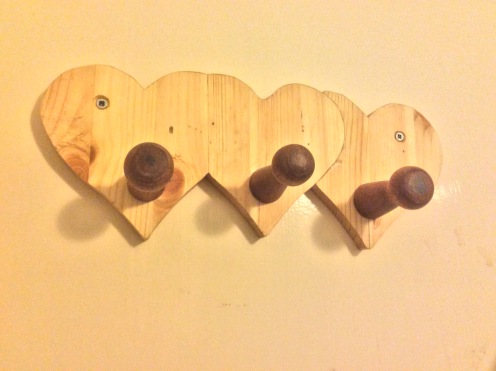
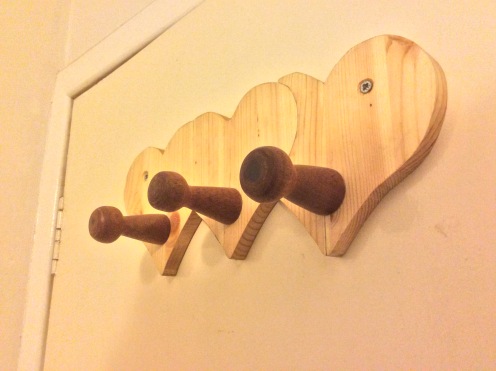
I took three simple but damaged pine hearts (the ❤️ kind not anatomical), unused leftovers and discards from the enterprise groups early St. Val’s day efforts. These I cleaned up, removed the broken edges and bad cutting and joined linearly together with glue to make a 3 in 1 heart back piece. Next I got a nice small 30mm square section of mahogany and turned it into three nearly identical nice chunky pegs on the lathe. These were waxed and glued into three holes I had drilled into the lower lobes of the three heart back plate. I had to sand off a little of the end of the pegs where they protruded through the pine hearts at the back. A couple small holes were drilled and the tops countersunk in each side to mount upon a wall or door. Then once dry to finish given a good coat of my favorite stain, Danish oil.
Now for the main event, the card!!! I had set aside some time back a few very thin pieces of pine off cut. These had come off of beams I was rethicknessing for a job and knew one day would be able to use for a variety of other little jobs. I had used most of these thin pieces over the last year or two, but had kept a couple of the nicer flatter less warped pieces to one side.
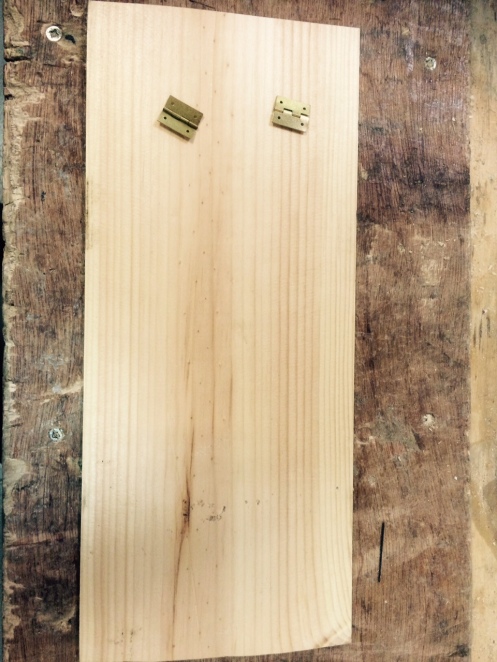
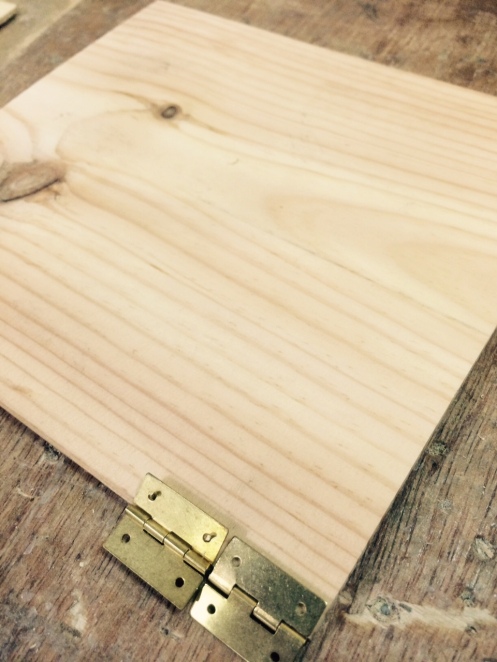
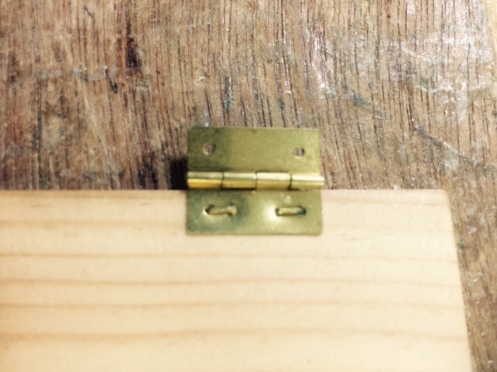
From one of our secret supply boxes at work I found some very small brass hinges and matching small brass nails, meant for use on small trinket jewelry boxes, these were perfect for my custom card. I started with the back part and the fitting of the hinges to this back part. I used a spare hinge as a spacer for the two I would be fitting to my card, then using the small nails I marked each position for the nails and hinge holes. With a 1 mm drill bit in a battery hand drill I very carefully (so as not to split this very thin and fragile piece of pine) drilled out the 4 holes i would need. Next i set the nails and hinges in place and trimmed the longer part of the nails down using my trusty Leatherman Wave 3 pocket tool, then used said same tool to bend the shortened nails over before hammering them permanently in place.


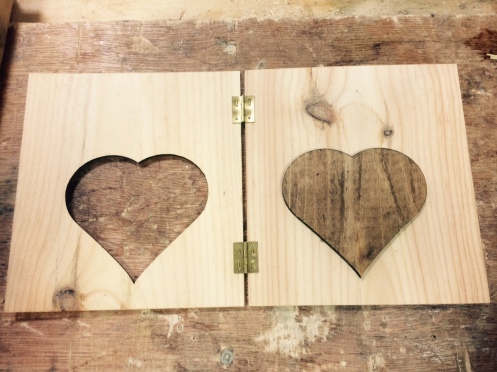
 With both hinges attached to the back piece of the card I took the front part through to our new toy at work, a 60 Watt flatbed laser engraver and cutter, very swish! after a few test cuts and playing with the position a bit I had my front piece done. A simple “Happy Anniversary” message (for that was the occasional inspiration for this card) engraved in the wood and a love heart cutout under that. Engraving and cutting done I next attached the front piece to the hinges in the same way as the back.


Next I had the heart cutout to stain and glue onto the back piece so that it was in the lower center of the inside of the card, but still very visible from the front when the card was closed. For this i used a dark oak Danish oil stain, and just normal PVA wood glue. Finally I hand wrote a very personal message inside the card in black pen and gave the whole thing a good coating of normal danish oil to finish it off. A nice job well done I thought!

Love the card! I once did something similar for a fortieth birthday. I just went freehand with a router with a 5 or 6 mm bit for the greeting on the front. I was probably using wood a bit thicker than you though.