Got the deer by the horns.

I get given lots of cool stuff by people who know I have an appreciation for junk, be it old, retro, modern, metal, wood, I love all kinds of cool stuff.
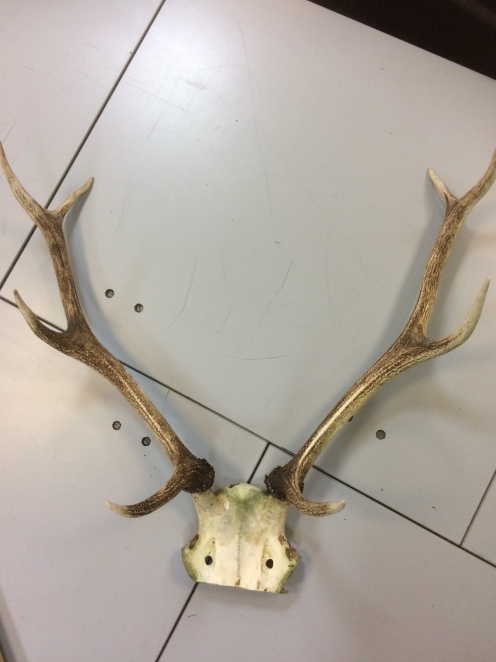
One day last week or so ago one of my student neighbours came to my door with a pair of deer antlers still attached to a portion of skull. These looked quite old, a bit green about the gills to be honest, probably long lost in a shed or loft and just waiting to be reborn.
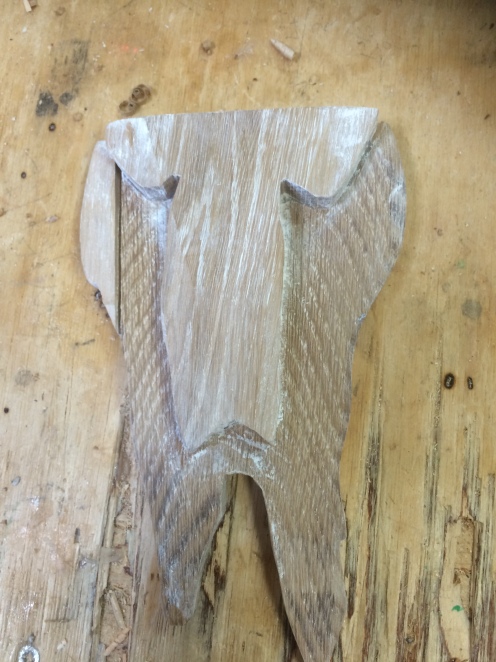
These antlers needed a mount, so they could be hung on a wall with pride, luckily I had a couple old oak floor boards kicking around. I cut each in half and glued them together edge to edge in the middle, and using what was left of the tongue and grooves of the boards on the other side. With the boards now joined into a rectangular piece of wood I used a data projector to impose the silhouette of a deer’s head and neck onto the wood and then simply traced the outline of said image onto the oak board.


Next stop the band saw to cut out the shape, fairly straight forward this was, and not long did it take, but what to do with the left over oak offcuts from the sides of the board. Well now, the skull fragment was a bit lonely looking I thought, so I decided to use the two larger offcuts of the oak to make two layers of replacement skull for the poor deer. I use the same imposed projection method for these two layers, and once glued together I tried to whiten them with some colour washing, which kinda worked, kinda not. Hmmmmm, moving on.


Positioning the antlers was an easy enough task as I had used them initially for sizing up the projection and making sure everything lined up. I next glued the wooden skull fragments into place on the back piece, making sure I was allowing enough space for the actual skull to be fitted and fixed in place. While the glue dried on those pieces I set about figuring out how I would attach the skull and antlers to the board. Having had watched lots of Supervet on channel 4 I decided I would just drill and use screws in the bone of the skull, as there was plenty thick bone for the screws to take a-hold of. In order to make sure the holes in the skull would line up with the holes yet to be drilled in the oak backpiece, I inserted some short nails into the holes I drilled in the back of the skull fragment, and once the glue was dry enough on the oak, repositioned it to where I needed it to be. Slight vertical pressure from my hands on the skull left 4 small indentations in the wood where the holes needed to be. These were drilled and counter sunk from the rear ready for the skull to be fitted.


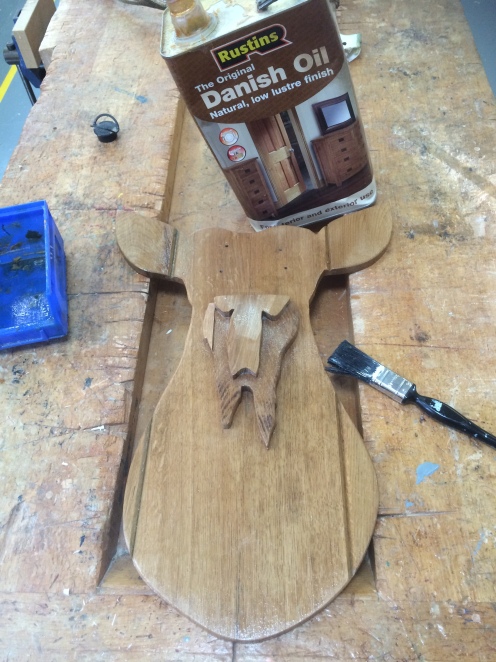
With holes all drilled and the fake skull parts fitted and glue fully dried, I now sanded down the edges and surfaces of the oak readying it for the inevitable coats of Danish oil that would soon be used to finish off this creation. I applied the oil with a paint brush so that I could get it into all the small nooks and crannies around the wooden skull layers. Sadly the oil washed out most of the white staining on the faux skull bits, live and learn. 2 coats of oil and 24 hours to dry out later I rubbed it all down with fine wire wool to remove rough raised grain and chunks of dried oil. A further rub down with bees wax and the horns were ready to be fitted permanently.
The final touch was to fit a small hanging hoop on the back so it could go on the living room wall at home. Job well done I think.
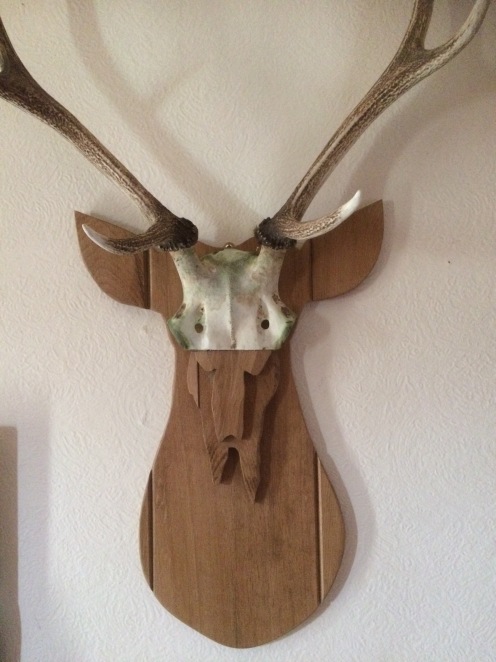
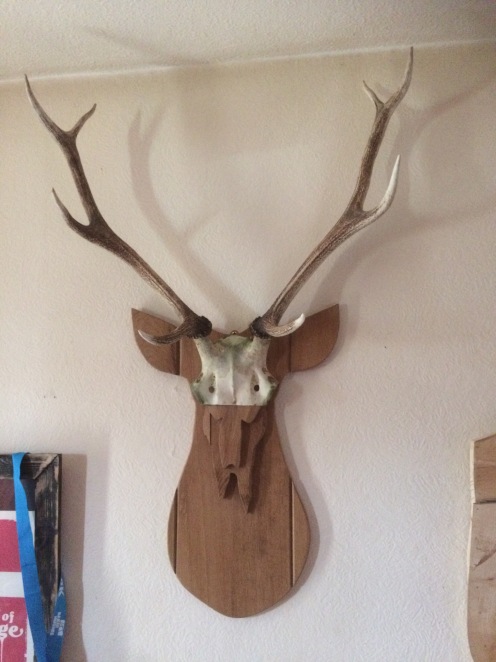

Bwah, that’s excellent. I love the shape of the plaque and how you recreated the missing skull fragment. Incidentally we saw a beautiful young buck this morning in our back garden. Although his head seemed in slightly better nick than this poor sod’s. ;oP
Hmmmm, a trap should be layed for this ever young buck methinks…..